Star Fruit; Carambola

They go for about 2 currency units apiece over here so they're not going to be on the plate very often - - but they are really quite pretty.

This is another in the series of weird fruits and vegetables. It's a Star fruit or Carambola.

I was reading in Wikipedia that you can make wine from these. Sounds like a real good idea - but expensive.

Also it uses the macro with flash thingy function of the camera but I'm probably going to buy a new camera anyway… because this one resets all the memory every time you yank the (rechargeable) batteries out to replace them (which is more or less every single day). The "picture taken" date is perpetually 1-1-1998.

Just Lost an Entire Post

I did a post about pea soup and there's not a trace of it anywhere.
¿Maybe user error?
¡Gah!

Tamarillo

I happily try the unusual fruits, vegs & other stuff in the "unusual products" part of my grocer's display. Most of them I even end up liking.

This is a Tamarillo; which is a fruit that quite resembles a tomato (native to Peru but usually shipped to you from commercial producers in New Zealand).

Tastes, to me, like a tart mango. This one's red skinned but they come in orange and yellow too.

Really tasty, but unusual, in a fruit salad.

Yes, this is another try with the new discovery of my camera's macro having a flash function.

¡ My Camera's Macro Setting Has a Flash !

I've discovered that when using the macro setting on this here old camera that the macro setting can work with the flash. Which I've never figured out before.

The following image uses my macro setting, daylight, and no fill flash. The colors aren't bad but somewhat muted.


This one uses the flash with the macro setting. Oh my, I'm so excited!
The green of the apple is really accurate. Note: These have been cropped but not adjusted for color or intensity in any way.

This one's an extra.


These are miniature scallop shells that we actually ate miniature scallops out of. Each one is just 4 cm across [1½"].

I might be able to save myself five hundred bucks by not having to buy a new camera. ¡ Great !

Note: Published via docs.google.com - which does wierd things with the pictures. It does not shrink them down but somehow crops them to the width of the blog column. So I'm going to have to re-edit this post to fix that.

Brussel Sprouts in Sour Cream

Since I had a rather a lot of brussel sprouts I had to find something different to do with the rest of them.

¡Really! This one's quite nice too. It takes the dreaded sprouts and casseroles them with bacon and quark / kwark; topped with a little browned bread crumbs. Just love quark too; sort of a smooth cottage cheese type of thing.

Okay, and as a concession to those consider sprouts bitter, mushy, nose-wrinkling wads of cruciferous terror (to quote Orangette) one might consider substituting green beans.

Ingredients:

  • 500 g brussel sprouts [1#]
  • 50 g chopped bacon [2 oz]
  • 200 g quark [7 oz]
  • 2 T bread crumbs
  • Salt & pepper
  • Olive oil
Procedure:
  1. Wash; trim discolored leaves from sprouts; hack off some of stubby bottom
  2. Blanch in boiling water 2 minutes (eliminates any bitterness)
  3. While that's happening, fry up the chopped bacon a little bit to soften the bits (and get rid of some of the fat)
  4. Drain sprouts and rinse with cold water (to stop them cooking)
  5. Quarter the sprouts, vertically
  6. Mix sprouts with quark & bacon, season with salt & pepper and dump into casserole dish
    • Top very lightly with bread crumbs
  7. Into the 175°C [350F] oven for 10 minutes
  8. Then under the broiler for 5 (to brown the breadcrumbs)
Notes:
  1. Optionally, top with cheese too - although that adds a whole mess of calories and fat and might overwhelm the taste of the sprouts
  2. Veggie substitutions might include green beans, asparagus

Brussel Sprouts & Water Chestnuts

Love those brussel sprouts! Really.
Hated them until I moved to Holland and discovered what good fresh vegetables tasted like. And that brussel sprouts can be a taste treat (instead of a gaseous horror).

The picture maybe looks a bit of a mess but that's mostly my fotog skills; 'm still saving for a new camera. The one I've got dates from 1999. A Toshiba PDR-M1 which has an astounding 1.5 megapixels.

Ingredients:

  • 500 gr brussel sprouts - fresh [1#]
  • 200 gr water chestnuts [6 oz]
  • 2 T olive oil - virgin
  • 1 T soy sauce
  • Salt & ground white Pepper
Procedure:
  1. Wash; trim discolored leaves from sprouts; hack off some of stubby bottom
  2. Cut in fine julienne (slivers)
  3. Blanch in boiling water 3 minutes (eliminates any bitterness)
  4. Slice water chestnuts in 1/3rds or ¼s or something (while the sprouts are a-boiling)
  5. Drain sprouts and rinse with cold water (to stop them cooking)
  6. Oil into a frying pan
  7. Add sprouts to pan
    • Stir around and saute a little
    • maybe a minute and a half
  8. Add water chestnuts
    • Stir around and saute a little
    • maybe a minute and a half
  9. Add soy sauce (for color & a little flavour
  10. Check if it needs salt & pepper
    • Probably just some white pepper
  11. Best enjoyed hot
- Done -

Come to think of it… this is simply a stir-fry; they never look very fancy. I'll have to try this again and change the presentation. Perhaps frying the sprouts lightly, and the water chestnuts separately (cut in equaly fine julienne), then plating the sprouts, sprinkling with soy sauce, then the water chestnuts over the sprouts. Might make for a more picturesque setting.

Tayin de Cordero: Lamb Tajine (Tagine)


Simply put, it's Moroccan Stew. The authentic but funny looking apparatus that its cooked in is also called a tajine. It's a clay base with a cone shaped lid. A dutch oven can substitute.

This recipe has lots of ingredients but it's really quite easy. Great for groups, can be mostly prepared in advance. And it keeps well; it's delicious(er) the following day.

By the way, the # sign is short for pounds. I don't have any idea where that abbreviation originated. But I'm curious.

Ingredients:

  • olive oil (virgin)
  • 2 onions - fine rings
  • 3 cloves garlic - minced
  • 2 kg leg of lamb leg [4#] - deboned & cubed

  • 2 T ras el hanout (a Moroccan spice mix)
  • 1 g saffron (½ t strands) [a pinch]
  • 1 stick of cinnamon
  • ½ t turmeric
  • 1 t paprika (normal, not hot)
  • 1 t salt
  • 1 t white pepper
  • water

  • 150 g dried apricots [½C]
  • 150 g prunes [1C] - destoned
  • 150 g dried figs [½C]
  • 100 g raisins - dark [¼C]
  • 150 g macadamia nuts - slightly cruched (almonds are the norm) (reserve a few)
  • 500 g potatoes [1#] - batons (batones/sticks)
  • 250 g carrots [½#] - batons (batones/sticks)

  • 250 g tomatoes [½#] - crushed (canned, jars, whatever)
  • 1 bunch of cilantro - chopped leaves (reserve a couple of sprigs for decoration)
Procedure:
  1. Brown the onions
  2. Add the lamb and brown that too
  3. Add the spices
  4. Cover with water
    • get it boiling
    • reduce to a simmer
    • cover
    • cook for 15 minutes
  5. After those 15 minutes remove a ½ cup of the cooking liquid
  6. Soak the dried fruits in the liquid (top up with water to cover, if needed)
    • set aside
  7. Continue cooking for 15 minutes more (now we're up to 30 minutes)
  8. Add the carrots, fruits & and macadamias (reserve some for dusting on top later)
  9. Cook for 15 more (adds up to 45 minutes)
  10. Check the doneness of the lamb - when just about there…
    • Add the potatoes
  11. Cook for 10 more (adds up to almost 60 minutes)
  12. Add tomatoes, chopped cilantro
  13. Cook for 5 minutes (that makes about an hour)
  14. - Done -
  15. Dust crushed macadamias on top and decorate with a few leaves of cilantro
Notes:
  1. Everything eventually goes into this one single pot so select a size that will hold it all and allow room to stir stuff.
  2. I used my 7-spice mix of ras-el-hanout; not my 45-spice mixture. I actually bought these when I was in Morocco so they are super authentic. Oh, I bought the tagine pan there too.
  3. Brown the lamb in batches if you have to. Avoid piling it in layers in your pan; it won't brown if there's too much in there
  4. Before adding the tomatoes
  5. When I use chopped cilantro I like to use only the leaves; not any of the stems
  6. Many people don't seem to like cilantro. This is cooked, not raw, and has quite a different taste. Or chicken out and use parsley(?)
Short version:
  • Total cooking time is probably just over an hour (depending on the cut of meat used)
  • Brown onions, then meat
  • Add spices, stir, add water to cover, simmer
    • At some point soak the dried fruit in some cooking liquid
  • Add carrots, fruits and nuts in the last ½ hour
  • Add potatoes when the meat is tender (probably in the last 15 minutes)
  • Add the tomatoes & cilantro when the potatoes are just about done and bring the dish back up to temperature
  • Decorate with nuts and cilantro
  • - Done -

Roses: Rosas Jan 19, 2007: 19 ene 2007

I was taking out the garbage today and saw this as I passed through the garden…

I guess it qualifies as the 1st rose of the season.
Speaking of which… I really must get around to doing the winter pruning.

And a special hi to all the family in Canada.

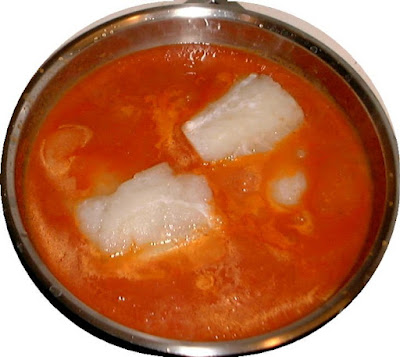
Cod in Tomato Sauce: Bacalao en Salsa de Tomate


Here's a quick thing to do with that tomato sauce I made a while back.

Ingredients:

  • Pieces of Cod (not codpieces) - fillets - individual size
  • Tomato sauce
Procedure:
  1. Pour tomato sauce into a frying pan
  2. Add cod (skin side up if it's got skin)
  3. Poach 5 minutes
  4. Turn (skin side down if applicable)
  5. Poach 3 minutes more (or until done [just starting to flake])
  6. Serve
Notes:
  1. No worries about overcooking the cod; it stays warm "on hold" in the sauce pan for quite a while
  2. Serve with bread; for soaking up the excess sauce
  3. This is often served with roasted red peppers; I certainly did

National Music Auditorium

Had a lovely time last night at the Auditorio Nacional de Música. A little classical type music.

The program was:

  • the overture An Unusual Case by Vincente Martín y Soler (born 1754 in Valencia, Spain; died 1806 in St. Petersburg, Russia). It is in this piece that he introduced the walz to Vienna, Austria where that dance style became rather a big "hit".
  • The Concert of the Malvarrosa (Malvarrossa is a beach in Spain)
    The unusual thing being that the composer, Antón García Abril, was actually in the hall for the performance. Usually I tend to think of composers as being all dead people. He was born in 1933 in Teruel, Spain. Got quite a round of applause, of course. Either for the quality of his composition or just for being alive.
  • The Ballad of the Heros by Benjamin Britten (B: 1913, d: 1976, U.K.). It's a sort of anti-war piece
  • Franz Joseph Haydn's (1732-1809) Symphony No 49 in F minor; the Passion. It uses a harpsichord instead of a piano so has that sound that's slightly reminiscent of the Munsters theme song.
This is way off of the usual food theme so I'll leave out the post about the Mozart concert I went to Sunday morning. We shall now return you to your regular programming.

Curry Beef: Trinidad: The Recipe

The picture is not super appealing; it's hard to illustrate chunks of meat in a sauce in any way that's at all unique.

Having prepared the spice mixtures for this dish I'm ready for the easy part. I just (more or less) followed the instructions in Madhur Jaffrey's book. She attributes the recipe to the Tiffin Restaurant; in Port of Spain; Trinidad; so my version is a 3rd generation variant.

Serve with white rice to better soak up the sauce with.

Ingredients:

  • 600g [1¼ lb] beef, 2cm cubes [1"] (stewing beef probably) {I could have used even more meat, no problem; up to a kilo [2 pounds]}

  • 1/3 C onions
  • 2 garlic cloves (big ones)
  • 1 shallot (the original recipe calls for 2 spring onions)
  • ½ t thyme (dried; or 1T fresh)
  • ¼ C cilantro (stems and all)
  • 1 habanero pepper (or scotch bonnet or something along those lines - hot)
  • ½ t ground ginger
  • ½ t salt
  • ½ t pepper corns (mixed) (or ¼ t ground black pepper)
  • 2 T water [H2O]

  • ¼ c olive oil
  • 4 cloves garlic; crushed and minced
  • 1 T hot curry powder

  • 900 ml [1½ pints] water (or beef stock) {I used water but would have preferred fresh beef stock if I'd had it)
  • ½ t salt
  • ½ t ground roasted cumin seeds
  • 1 t amchar masala
Procedure:
  1. Put all the top stuff except the beef (the onions thru to water) into a blender and smoosh until it's a paste
  2. Mix the paste and the meat in a bowl
    • Marinade, covered and cool, for 4 hours (minimum 30 minutes)
  3. Put the garlic and oil in a cold, large, wide, pan
  4. Turn on the heat - medium high
  5. When the garlic starts to sizzle add the hot curry powder
    • Stir for 10 seconds
    • Reduce heat to medium
  6. Add the beef and marinade paste to the pan
    • Stir around for a minute to get things back up to temperature
  7. Reduce heat to medium low
    • Cover the pan
    • Cook for 10 minutes; stirring a couple of times
  8. Add the water, salt, cumin and masala
    • Stir and get it simmering
  9. Reduce heat to low
    1. Cover and cook for 1½ hours; until tender
  10. Uncover, remove meat, crank up the heat and reduce the sauce until sauce-like
  11. Return the meat to the sauce
-- Done --

Notes:
  1. These blended pastes of onions, garlic and stuff are fairly typical of Indian curries
  2. Instead of a blender it can be fun to use a mortar (and a lot more work)
  3. The idea behind using a large, wide, pan is so that the pieces of meat are not piled on top of each other but more in a single layer; this is so the meat will start to fry instead of stewing in its own juices
  4. Don't used powdered beef stock or cubes because they're very salty and contain MSG (flavor enhancers) - blah
  5. The sauce should coat the back of a spoon, like a gravy
Short version of the instructions:
  1. Buy (hot) curry powder, ground roasted cumin seeds and amchar masala at your local specialty spice shop or some such place
  2. Make a paste-marinade out of the 1st set of ingredients
  3. Marinade the meat for half an hour
  4. Fry the garlic and add the curry powder, frying this for a few seconds
  5. Add the meat, water, salt, roasted cumin seeds, masalsa and salt
  6. Cook for 1½ hours or until tender
  7. Reduce the sauce
  8. Serve
If really really not crazy about spicy foods eliminate the habanero pepper and use regular rather than hot curry powder :-(

Curry Beef: Trinidad: Preparation

The Ultimate Curry Bible by Madhur Jaffrey is a fantastic book if you like curries at all. Think… Indian food; but she doesn't just cover India she does curries from all over the world. I wanted an excuse to use some (okay, one) of my habanero chilies and broke out the bible.

This was not going to be too easy; before I could start with the recipe I had to make three of the ingredients: hot curry powder, roasted cumin seeds and amchar masala (a spice mixture). Or just buy this stuff at the store if you can find it.

Hot Curry Powder
Ingredients:

  • 3 t whole brown mustard seeds (or black)
  • 4 t whole peppercorns (black ones; in my case I used a mix of dried black, brown, red and green)
  • 2 T whole cumin seeds
  • 4 T whole coriander seeds
  • 11 whole cloves (or 10 or 12 or something)
  • 6 dried hot red chilies (less if you're cautious about "hot" chilies - but do not omit)

  • 2 t whole fenugreek seeds
  • 2 t ground turmeric
Procedure:
  1. In a small heavy frying pan lightly toast the first 6 ingredients until some of them change color and they develop a "roasted" smell; over medium heat
  2. Remove from the heat
  3. Add the fenugreek and turmeric
  4. Stir for 10 seconds
  5. Remove from pan & cool
  6. Grind finely
  7. - Done -
Notes:
  1. Fenugreek, turmeric and cloves are what really make a curry.
  2. Madhur Jaffrey advises fanatics to add ½ to 1 teaspoon of chili powder (not for me)

Roasted Cumin Seeds
  • 3 T whole Cumin Seeds
  1. Roast in a small heavy frying pan until toasty and full of aroma; over medium heat
  2. Remove from pan & cool
  3. Grind finely
  4. - Done - Dead easy, wasn't it?

Amchar Masala
Ingredients:
  • 1 t whole brown mustard seeds (or black)
  • 2 t whole peppercorns (black ones; in my case I used a mix of dried black, brown, red and green)
  • 2 T whole cumin seeds
  • 4 T whole coriander seeds
  • 1 t whole fenugreek seeds
  • 1 t whole fennel seeds (this is the magic of this mixture)
Procedure:
  1. Lightly roast in a small heavy frying pan over medium heat
  2. Remove from pan & cool
  3. Grind finely
  4. - Done -
Notes:
  1. I didn't have brown mustard seeds for this so I just put in a ¼ teaspoon of regular yellow (Gulden's) mustard powder (not a really good substitution but that's all I had available)
This roasting / toasting of the spices is one of the things that makes "Indian" food a little unique.

Luckily I have all these unusual seeds in house all the time so I was ready to go. Once these three things made I could actually go off and consider making the curry; which is actually quite easy and will be in the next post (since this one is starting to drag on for a bit).

Nickel Creek - A Lighthouse's Tale & Smoothie Song

Another post without a recipe. I figured I'd try one of these new 2nd-gen internet things and imbed a video from youtube. No doubt the thing could disappear at any time; but meanwhile enjoy the talent of this incredible New-Grass musical group.
name="movie" value="http://www.youtube.com/v/DnN8xLNmsH4" />

Just in case the 1st one evaporates some day... I will put in a back-up video.
name="movie" value="http://www.youtube.com/v/7C4UgSvcmpY" />

Worth noting; if you enjoyed them you'll be sorry to hear that the group's broken up.

Pound Cake (picture)


I was making some little pound cakettes yesterday and they turned out pretty well. No recipe for this today. I was just testing the macro setting on my (very old) digital camera and I thought that this was a pretty good result; although undoubtedly underlit.

I have also discovered that the size of the picture you get when you click on this little one is the same size as the one I uploaded (1200 pixels wide). I thought that Blogger used to resize them downwards but maybe it stopped doing that in this new version 2 of their system.

In any case, I really must spring for a new camera some day soon.

The same cakes but taken with the regular setting and using the flash. I believe this might be better for color but worse for focusedness.

Habanero Chiles


This is a Habanero Chile. They're very very hot; often called the world's hottest spice (wikipedia). I have a little glass pot of them, stored in vinegar, and never get much (any) chance to use them. It just so happens that I was making a Trinidadian Beef Curry the other day and that was my excuse to chop one of these babies up.

You can see in the pic that other recipe ingredients included onions, shallots and cilantro. You can also see the Le Cordon Bleu logo on my Wusthof knife. And my green cutting board. I actually have a sort of a thing for cutting boards; I have 5 differently colored big plastic ones and a half a dozen others besides - - - and I use all of them at times for various different things.

Now I only have about 9 of these Habanero suckers left. I'll have to work my imagination some more for other hot recipes.

Crazy Bread: Formatted and Commented


Ingredients:

  • 5ml sugar [ 1 tsp]
  • 10ml instant-rise yeast [2 tsp]
  • 200ml warm water (quite warm but not hot) [almost a cup]
  • 500ml all-purpose flour [ 2 cups]
  • 5ml salt [1 tsp]
  • Butter
  • Grated parmesan
Procedure:
  1. Sugar, water & ½ of the flour into a bowl; add yeast; stir (do not add the salt yet; this is a new step to help it rise more)
    • Wait 5 minutes
  2. Add the salt, the rest of the flour & mix with a big spoon, until it won't mix any more
    • Wait 5 minutes
  3. Knead it (by hand) until it makes a ball of dough. (somewhat strechy in texture, no flour gobs, a tad bit sticky) (I recommend very very little stickyness; it should no leave peaks from your hand prints)
    • let it sit for five more minutes (or more)
  4. Roll it out into somewhat of a square, approx 0.75cm [½ inch] thick.
    1. cut it in half, and
    2. then into strips about 2-2.5 cm wide [1 inch].
  5. Place the strips on a baking sheet (one with edges so they didn't fall off)
  6. Bake at 350F (175C) for 10 minutes (until lightly colored)
  7. Take them out, and
    • butter them
    • lightly sprinkle with grated parmesean cheese
  8. Put them back in for 5 minutes until the cheese melts (and for more color)
Notes:
  1. Don't put in the salt when first mixing with yeast; it slows the yeast action
  2. For lighter sticks (more rise) give them a lot more time rising when you do the yeast/flour/water mixture; maybe 30 minutes. (added this note after some more thought)
  3. For lighter sticks (more rise) give them a little more time rising after the kneading (up to an hour should be fine)
  4. Regular shapes are industrial; go for creativity. But they should be similar in size & thinness to help them to bake evenly
  5. This is very similar to pizza-dough.
  6. Use real butter; not margarine - for flavour
  7. Instead of butter and cheese try butter and sugar (delish). Here in Spain we would use virgin olive oil and garlic.
¡ Done !

Crazy Bread; Guest Post

A guest post from far away Canada. It may be that I've inspired some of the family to get into cooking.


i am visiting the grandparents for tonight. (i think they wanted me to stop gaming and come socialize lol) i made them crazy bread, and i decided to send you the recipe and a picture. then you can make some, and tell me how to improve mine.

  • 5ml salt
  • 5ml sugar
  • 10ml instant-rise yeast
  • 200ml warm water (i used the warmest their kitchen sink could go)
  • 500ml all-purpose flour

i combined all ingredients into a bowl. (flour, sugar, salt, yeast, water, in that order if it makes a difference) then i mixed it with a big spoon, until i couldn't get it mixed any more. then i kneaded it with my hands until it made a ball of dough. (somewhat strechy in texture, no flour gobs, a tad bit sticky) then i let it sit for five minutes. after 5 mins was up, i rolled it out into somewhat of a square, approx 0.75cm thick. then i cut it in half, and then into strips about 2-2.5 cm wide. i placed the strips on a baking sheet (with edges so they didn't fall off). then i baked at 350* for 10 minutes. i took them out, and buttered them (with one of those cool brush thingys, they are fun) and lightly sprinkled them with grated parmesean cheese. i put them back in for 5 minutes until the cheese melted. then i let them cool, and put them on a plate and took this picture for you!

… that's the way we were told to make them at school. they didnt rise a lot, i personally think they should have been puffier, but thats the way the teacher told us. (how do u make them puffier anyways?) they tasted good though, so i guess that's all that matters. i didnt do a very good job at making even slices, so they were a tad bit lopsided. i had fun making them, and grandma and grandpa had fun eating them. grandma had made chicken noodle soup, so we dipped them. we enjoyed it. anyways, i thought you would be interested in my cooking adventure.

Pork Tenderloin Fillets: Solomillo de Cerdo Filets

Photo credit: National Pork Board
I had to make a quick lunch today so I ran out to the local self-service grocery and picked up

  • A bag of salad (fancy mix)
  • 700 grams (1,5#) of pork tenderloin [I had the butcher trim it and cut it in thick {1cm <1/2">} fillets]
  • a bag of peanuts (not for the recipe; just for me to snack on)
Ingredients:
  • 700 gr pork tenderloin fillets
  • 4 T olive oil (virgin)
  • 1 clove garlic
  • 1 chili pepper (Szechuan) (really important)
  • 50 grams (2oz) cured ham; chopped (not as in bacon; which is smoked)
  • 3 T Dijon mustard
Procedure:
  1. Turn oven to 175C (350F)
    • Find an ovenproof dish for the meat
  2. Frying pan; put in the oil; medium heat
  3. Smash/flatten the garlic and toss it in
  4. De-seed the pepper and toss it in
  5. Fry these two up until the garlic is browned; basically you're flavouring the oil
  6. Pour the oil/garlic/pepper off into the ovenproof dish
  7. Put ham in the frying pan
    • fry slightly; just to caramelize the outside a bit (for extra flavor)
    • add this to the ovenproof dish
  8. Add the Dijon mustard too
  9. Stir it around with a fork or a small whisk (it doesn't have to be very smooth)
  10. Lay in the fillets; coating both sides (go ahead, be messy)
  11. Roast for 15 minutes
    • Turn off the oven and leave in there for 10 more
    • To an internal temperature of 55C or so (130F)
Notes:
  1. We still mostly have butchers in the shops that cut the meat to order although prepackaged meat has been showing up in the last few years
  2. When in doubt I always use 175C (350F) as an oven temp; although roasting can generally be done lower
  3. I used bits of Serrano ham I had lying around; you might use that Italian ham I'm always forgetting the name of
  4. Americans might to cook for 15 minutes a pound to an internal temperature of (at least) 160F (this is according to U.S. government recommendations and is guaranteed to remove any trace of flavor from the meat)
Short Version:
  1. Flavor oil by frying some garlic and chili pepper; reserve
  2. Fry up a little bacon
  3. Mix in some Dijon mustard
  4. Coat the pork tenderloin fillets
  5. Roast at 175C for 15 minutes & let stand for 10 more (in the oven, door ajar)
Ta da