Picnic


---Beautiful egg whites --- soft peaks --

Macro mode on the new camera sometimes works well. That, and I'm learning to use it properly.

Way behind on posting because of this here picnic I'm arranging -- in the garden. Barbecue tomorrow = Rain forecasted.

That, and the tiramisu base recipe (ladyfinger-like) is not working worth a damn. Evidently the Professional Baking cookbook by Gisslen is renowned for being error-ridden - although the techniques are accurate the recipe editing leaves much to be desired. I've done the ladyfinger base twice and am still not happy with the results. Maybe I'll try yet again - or maybe I'll just add more rum to the coffee mixture I infuse the cake base ith and no one will care.

I've got a whole lot of shopping to do tomorrow morning before lunch (which, here in Spain, happens about 2:00 so that give me a break time-wise) and tonight several things to prep - including: potato salad (French style), the famed tiramisu, and veggie skewers. I'm guessing I'll be needing a glass of wine to get me through this.

A couple of pics to hold us over:
Ingredients: Yolks, sugar, whites, lemon, more sugar, flour


My gorgeous copper bowl to whip up egg whites. That's 4 whites in there. It's a very big bowl. And a really big whisk.

Size matters.

Ladyfingers: Tiramisu Base

To make Tiramisu you need the base and middle "cake" layer. These are traditionally made from "Ladyfingers". The quick & easy way is to use store-bought cookies. The slow & difficult method is to make your own. Actually, it's not so slow nor very difficult.

Recipes

Joy of Cooking

Ingredients

  • ½ C cake flour (we don't have this in Spain) - well sifted, 3 times, set aside
  • 1/3 C confectioner's sugar (nor this either)
  • 1/8 t salt (yes, this we have) - sift sugar & salt, set aside
  • 1 egg (this too - w/o the salmonella fears)
  • 2 egg yolks - beat egg & the 2 yolks until thick & lemon coloured
  • 2 egg whites - beat until stiff (the whites, not your wrist)

Procedure

  1. Fold sugar mix into white.
    • Beat until thick again.
  2. Fold egg mix in.
  3. Fold flour in
  4. Pipe into finger forms
- Done -

Professional Baking

Ingredients

  • 180 g egg yolks [6 oz, about 9 large]
  • 90 g sugar [3 oz, big 1/3 C]
  • 270 g egg whites [9 oz, about 9 whites]
  • 150 g sugar[5 oz, small 2/3 C]
  • 1 ml lemon juice [¼ t]
  • 300 g pastry flour [10 oz, 2½ C]

Procedure

  1. Separated-egg sponge

Notes

  1. Really, yes, that's the entire procedure from the professional baking guide's instructions. The idea is that we're supposed to know what a "separated-egg sponge" entails.
    Which amounts to:
    1. Beat yolks and sugar (ingreds 1&2) over hot water & beat until it's 43C [110F] (that is, make a sabayon)
    2. Whip whites, sugar & lemon juice (3&4&5) until firm, moist, peaks (lemoned meringue)
    3. Fold these 2 mixes alternately into the flour (sabayon and meringue with flour)
    4. Pipe into fingers or a sheet-pan
  2. And we actually weigh the ingredients instead of using measuring cups or counting eggs because eggs vary in size and measuring cups are imprecise.
  3. This recipe makes a load more mix than the JoC one because it eventually tuns into a square shaped Tiramisu with 24 pieces
Pic will come tomorrow when I actually bake the thing. I forgot to get lemons today so my plans to manufacture it tonight are dead.

Nanaimo Cake Follow Up


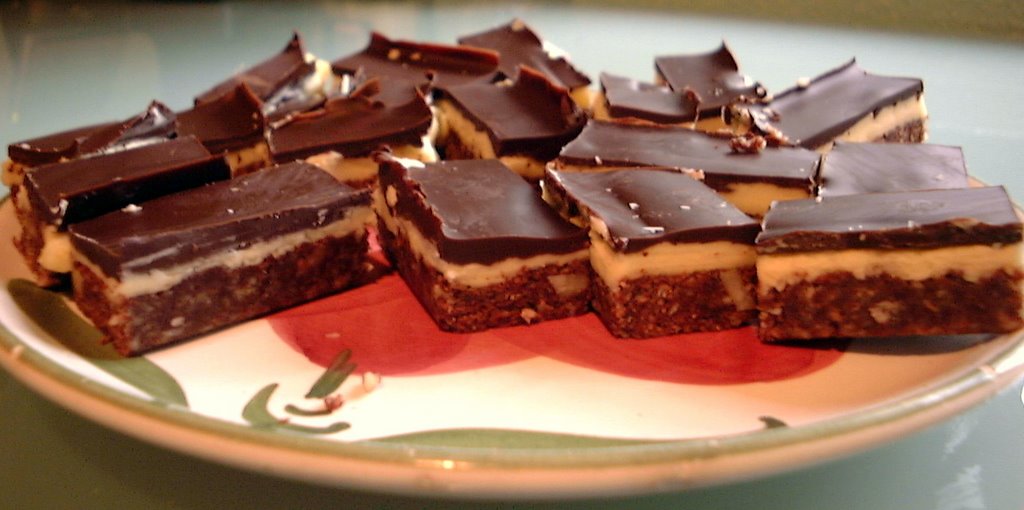
In an earlier post I mentioned trying to lighten up and develop height on a Nanaimo Bar. It had mixed success. The bar was higher but failed to reach cake height. Then it turned out that cutting it was rather messy. Since the dark chocolate top layer was thick and somewhat hard the new fluffy middle layer couldn't withstand the pressure of cutting the chocolate and tended to squeeze out all over the place; making for smooshed pieces when they tried to partition the thing.
I hadn't anticipated that.

Next time... thin thin chocolate top layer and another attempt to provide much more volume in the middle layer.

In the following foto, although fuzzy, you can see the thickness of the middle layer somewhat; compare to the traditional one.


Note: The bases (bottom layer) on both these photos are about the same thickness. It looks thicker on the small ones because they were extra close up.

Quick Tiramisu Pic


It turned out well. This is a mini-misu - only about 5" across. The big one looks nice too (I'll post the foto when i do the recipe.

Recipe to follow.

Carne: Meat for Lunch


Speaking of pictures, here's a simple one of lunch a couple of days ago. It's naturally raised (organic) beef from the fine people at Braman. Delicious; has real taste. Supermarket meat is bland in comparison. These are field raised, fed real food without chemicals, hormones or unnecessary antibiotics. Then, on the down side (for them) slaughtered (that is, killed); but in a supposedly more humane manner than the average cow. Probably that all makes the meat better for you - - and it certainly seems like the decent, humane thing to do; giving them the best possible life under the circumstances. If you're gonna eat meat do so in a way that is thoughtful of the end to end process. Thus endeth today's lesson.

Picture might be a tad fuzzy because I was using the macro setting - - but at too great a distance.

Preparation:

  • Salt and pepper both sides
  • A sprinkle, very slightly, a little chinese 5 spice powder
  • Grill (oven broiler) side one for 7 minutes
  • Side 2 for 5 minutes
  • Eat
Sometimes food is not complicated.

A Cup of Tiramisu


The Nanaimo Cake is a request from a neighbour for someone's birthday party. They also want a cake for the family; not a regular birthday cake though. So we figured a Tiramisu might be good. It's been a while since I made one of these (read... maybe never) and since I'm working in industrial sizes I figured I'd make a couple of sample Tiramisus with the leftovers. One normal sized one for the family fiesta, one smaller one (which I'll probably freeze) that's for 4-5 persons and I made two cute little individual ones - - of which you will find a picture of one above.

Well, it's certainly been a productive bloggy week so far; having a camera that actually works hasn't hurt the inspiration either.

Tiramisu layers are (bottom - up): sponge cake, soaked in espresso coffee, simple syrup and rum, mascarpone filling, another sponge, more filling and topped with a dusting of cocao.

Nanaimo Cake / Bar


This is a quick draft post to remind me what I did to change the classic Nanaimo Bar recipe to something with a little more volume in the second layer so it'll be somewhat taller; more cake-like than a thin flat bar (think... Tiramisu). And although I'm calling it a draft I'll publish it so you all can 'share the experience'.

The regular "Nanaimo" is a pretty flat little thing so I put wax paper around the sides of the pan to allow for more height. Here's a pic of the traditional ones:


Make the usual Nanaimo Bar filling (butter, icing sugar, Birds Custard Powder and cream) then add (this is the "tweaking" part; the big experiment):

  • Dessert Syrup:
    • Which is Simple Syrup (400 ml - sugar and water [equal amounts]), heated to 105C and poured slowly into 2 whipped egg yolks (probably would have been better with 3); continue whipping until cool. maybe that should have been 110C. It takes quite a while to get it up to this temperature - I ran out of patience.
  • Add ¼ tsp of vanilla powder (which I added to the hot mixture, a mistake. One doesn't add flavour to something boiling hot because it burns off the aromatics; wait until it's cool).
  • Mix dessert syrup with filling.
  • Whip 400 ml heavy cream;
    • fold into above mixture.
  • Pour onto chilled Nanaimo Bar base (which is graham crackers, coconut, toasted walnuts, butter and cocoa - and
    • spread evenly.
  • Chill really well (into the freezer if it doesn't "take" in the fridge)
Volume-wise it seems to have worked. The cake/bar is certainly taller than the regular Nanaimo Bar. Still, not a really tall result - I would have preferred about 50% more height.

Hopefully this will "set" sufficiently to stand alone and be able to take a chocolate topping.

Later, I'll top it with the chocolate layer (melted dark unsweetened chocolate with sugar and butter); which I better pour on when it's pretty cool to avoid melting the whipped cream in the filling.

This is a lot like doing a mascarpone filling but with a butter/powdered-sugar mix to start instead of the mascarpone cheese. Hey! Why not just make a regular mascarpone filling and flavour it with Birds? Wish I'd thought of that yesterday. Maybe next time (which might be tomorrow if this concoction doesn't work).

Croquette Ingredients


I was making croquettes (krokets, croquetas) the other day; these are the ingredients (left to right):

  • eggs
  • Iberian ham (front) (really seriously delicious stuff)
  • bread crumbs (back)
  • olive oil
  • sunflower oil
  • butter (also in the little plastic tub)
  • flour
  • onions
  • milk (whole, none of the skimmed muck for me)
Also needed but not pictured is salt, pepper and some nutmeg.

This was to make about 150 of them so there's more volume than would be used in the average recipe.

When it come right down to it these croquettes are a thick bechemal sauce, mixed with some meat for flavour, and then rolled in bread crumbs and then fried. Simple and delicious. A common snack in Spain and the Netherlands.

Simple everyday things you have around the house - except for the ham of course (although we usually have some on hand; but we're in Spain).

These are the same ingredients - somewhat later.


Recipe to follow

Gastromaquia - A Restaurant / Tavern

As we were strolling around the zone of Chueca in Madrid yesterday afternoon we came across a quaint little tapas bar that was just opening up for the evening and stopped in for a glass of wine (some Ribera de Duero or other). The place has a bar-ish front half (stand up) and about 7 or so s table in the back - and a teenie tiny kitchen. Three burners, an oven, and no room to swing a cat - not that I would. maybe the kitchen amounts to 13 square meters and it's mostly full of equipment rather than walk-around space.

Location: Calle de Pelayo 8 (Chueca), Madrid - - see map
phone: +34 915 226 413
also or formerly known as "
La Taberna De Pelayo"


They call it a "Taberna Gastronomica" - a Gastronomic Tavern


Optical character recognition of this pic of their menu worked pretty well. I only had to fix half a dozen misinterpretations.

GASTROMAQUIA

Titulares de la Semana

Anchoas c/ pan con tomate 9.00€
Quesos c/ manzana, tomate dulce 9.70€
Gazpacho de fresas con ahumados y yogur 7,30€
Espuma de patata, yemas y cebolleta 5.40€
Tomates rellenos de mousse de atún 6.10€
Mezclum de lechugas c/ mozzarella 6.90€
Carpaccio de pato c/ praline de almendras 7.20€
Crujiente de Brie, jamon de pato y rucola 7.20€
Huevos fritos c/ migas y jamón ibérico 8.60€
Espaguetis c/ verduritas y curry 7.60€
Lasagñia cremosa de morcilla y manzana 7.40€
Risotto de Idiazabal 7.90€
Atún plancha c/ morcilla Boudin y manzana 13,60€
Cordero c/ cous-cous y verduritas 12.00€

I won't translate any of that; you can practice your Spanish ( the "c/" means "con" which means "with"). Rest assured it all sounds delicious; even though some of the dishes are based on simple stuff like fried eggs, spaghetti, bread, lasagna, or a tomato.

wagaboo, chueca, fun eating

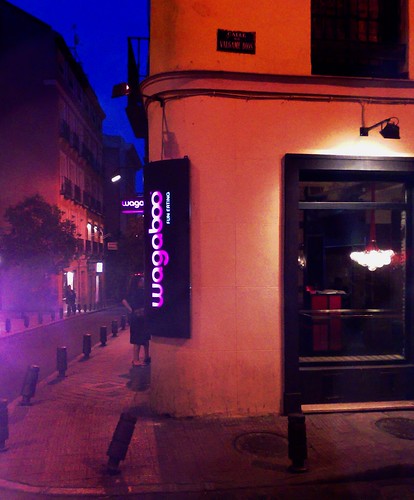
From the street:

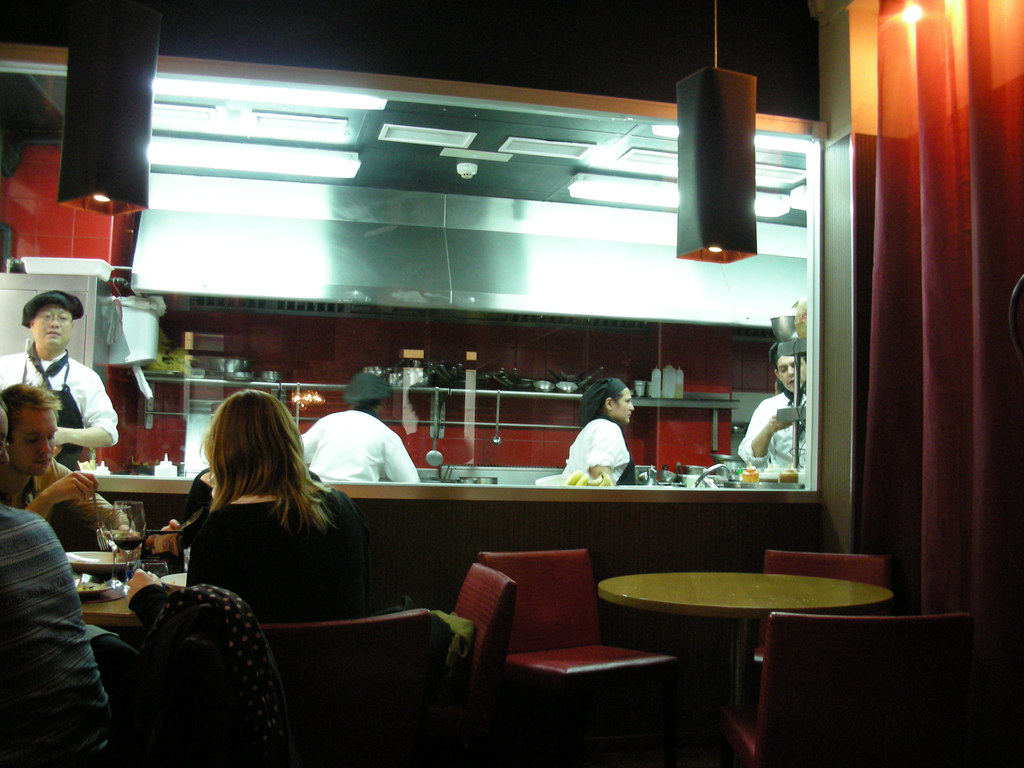
Went to wagaboo last night for dinner. It's a popular spot in the Chueca (gay) section in the centre [center] of Madrid. We were the first in the door; 8:50 PM - - we eat dinner late in Spain - - the place didn't start livening up until 9:30 or so.

Their specialty is noodles: Italian, Oriental - various types - - and made fresh to boot. Also the menu has some meat and fish for those not into the carbohydrate experience. Inexpensive, nice decor, open kitchen (which I particularly enjoy - watching the team assemble the meals). The kitchen pic was snatched from a flickr user [credit where credit is due].

The food's okay, inventive, not killer flavors; but with nice presentation and packaging. Wine list is okay too and reasonably priced. We had a good reserva Rioja for just €19.

Total bill for 5 people: some beers, a couple of starters, 4 noodle dishes, one grilled tuna steak, wine, & 3 desserts was €113; so €23 [$] a head. Plus €11 for parking (!).

Make a reservation because it usually fills up - even on a Monday night. It's so popular that the opened another one just 3 blocks away.

Their slogan, "fun eating", is a little bit lame though.

Inside:

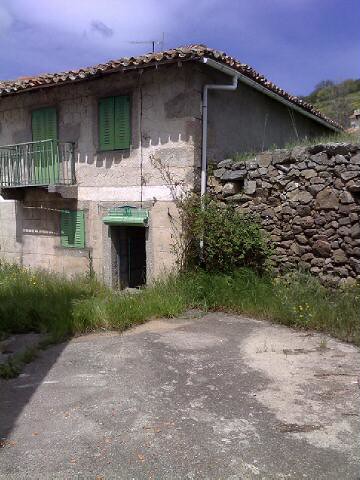
A Casa in the Sierra de Gredos

A little house in a littld village in the mountains.


Sent direct from phone.

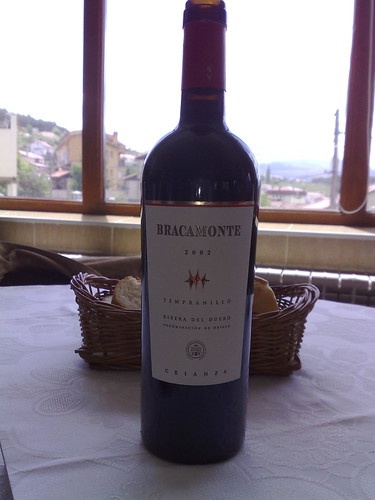
Vino @ lunch 02/06/2007

Bracamonte 2002. We were in the area and figured we'd try a local wine. Considering that this is a Ribera de Duero there wasn't really much risk.

Saga of the phone -> blog story on this one. The process here was 1) take picture 2) send to flickr via wireless lan at home directly to Flickr (the phone has a tie-in to my flickr account built right in 3) open Flickr on the laptop browser (I guess I could use the phone's browser - but I didn't) 4) click "blog this" and 5) write this commentary 6) post entry

Closer, but what I'm really chasing as a solution is directly from the phone to the blog. Haven't found a way thay works yet.

Flickr

This is a test post from flickr, a fancy photo sharing thing.

Tryout - Google Mobile

trial picture - smallish

This trial by post to Blogger Mobile might or might not work.


Update: It sort of ½ worked. The post posted but the picture didn't.

Please excuse this period of messiness while I attempt to get some of this technology to cooperate.

Roux

This was a test post by email from my phone. It had a picture in it but that didn't "take".

I guess I'll try again; with Blogger Mobile - - which I suspect won't work from a phone connected to a Spanish mobile phone company.

I'll add the (missing) picture later.