Showing posts with label recipe. Show all posts

Melon Granita : Cantaloupe with Cantaloupe-Ice

melon-granita-23082009598

It was in August that I made this.   You can see how the sliver of cantaloupe is cleverly sliced along the skin and that the vertical cuts made through the flesh; with the pieces pushed in alternating directions.  You’ve seen this a hundred times at restaurants.   It’s a little bit decorative and very simple.  People seem to like it.

The granita (kind of a lumpy sorbet):

  • 1/2 cantaloupe, deseeded
  • 1/4 cup fine/superfine sugar (not a lot)
  • 2 t lime juice (juice of 1 lime)
  • 1/2 t vanilla (liquid)
  • a pinch of salt (or less) because salt makes things taste sweeter sometimes (yes, it really does)
  1. Blend all the ingredients together; getting some air into the mix won’t hurt (a food processor is fine)
  2. Put into a freezer proof container, shallow makes it happen faster as does using metal or glass rather than plastic
  3. Mush it around with a fork once in a while (1/2 hour) and scrape the sides of the container
  4. Continue until there is no liquid left and you like the texture (3 or 4 hours probably but plan on it taking longer – just in case; it could be a little as 1 hour.  If it is happening fast, check and stir more often)
         It will be fairly granular (see picture)

Done

Caramelized Onions

Before:
cebolla-antes-21082009583

After:
cebolla-caramelizada-21082009584

These are julienned (sliced) onions (two of them); pan fried slowly in olive oil (I use first cold pressed virgin for almost everything but this does not demand the very best – and I use it somewhat generously, as you can see).  Brown until they’re almost a jam texture. This could take a half hour, easily; probably more. Add 1 t white wine vinegar and some salt to taste at the end. At no point is any sugar used – the vinegar and salt will make it seem to taste sweeter.

Now, looking at the picture, I think these should have gone on a little longer.

There’s also another technique for doing caramelized onions that involves less oil and more water; perhaps it’s healthier. You can look at it somewhere in this other post.

Ensalada : Salad

  ensalada09012010860
Eat healthy once in a while. Then… add some cheese.  This is an at-home version of a salad that I used to do in a restaurant.

  • Mixed salad greens (gourmet style blend)
  • 1/2ed cherry tomatoes, cut horizontally (I put the halves face-up to catch the dressing, in the restaurant we put them face down)
  • goat cheese (chevre) , slightly microwaved to just melt it a little (several small rounds or one slice of a big round) Cut chevre with a wire-style cheese slicer; there is no other practical way
  • whole walnuts (not in the pic because I forgot them)
  • reduced balsamic vinegar (take regular balsamic, boil a bottle's worth until reduced 2/3rds, add salt - or buy balsamic glaze [shudder])
  • olive oil, virgin, first cold pressed – making sure to drizzle the face-up tomatoes
  • a few flakes of Maldon salt
As you can see I was having fun with links.

Saté Pork : Satay

I buy pork (and beef and chicken) in largish chunks, pre-cut it, bag it in meal-sized quantities and freeze it. The pre-cut bit is important to me for later usability. When I want a quick lunch I don’t want to have to thaw then trim and dice my meats. This was a stir-fry cut pack of pork.
satepork15012010873
Brown the meat real well. Not to the point where it’s simply “not red” but to where the meat has some caramelization on it; not just blah-gray. This requires a blazingly hot pan.

This pork (500 grams [1#] was marinated for a couple of hours in

  • 2T olive oil
  • 2T soya sauce
  • 2T white wine vinegar
  • 1t Habanero hot sauce (should have used more)
before flash-frying it.

Served with some peanut sauce (Indonesian/Dutch) and plain white rice. No recipe for the peanut sauce because I made it from a pack (for shame). The sauce was slightly disappointing so I’ll probably not do that again.

Sloppy Joes of a sort : Curried Chilied Ground Beef

This will be the last uitsmijter post for a while. It happens that this one reminds me of sloppy joes. Do you remember sloppy joes? My mom used to make them often and we thought they were quite a treat.

Sloppy Joes were made of ground beef, tomato sauce and chili spices, more or less, I think. We always had them open faced.

This one I did yesterday was with cheese under and an egg on top – which brings it into uitsmijter territory. This is how it was constructed:

sloppjoeuits
I was having fun with foto editing tools – that’s a single picture.

  • 500 grams [1#] of ground beef
  • 1 T of masala curry paste (Indian)
  • 2 T Thai red chili paste
  • 1 T of 7-spices mix (Moroccan, called hanout sometimes)
  • 400 ml of tomato sauce (tomato cooked with olive oil and onion)
  1. Fry the ground beef in just a drop of olive oil (or not) with just a dash of salt
  2. add the pastes and the tomato sauce
  3. taste as it reduces to adjust the spices. If you’re nervous about hotness use just one tablespoon of Thai chili paste for starters and adjust it later
  4. simmer to reduce to on-top-of-bread consistency
  5. add salt (do not skimp on the salt) at the end

This might seem a horrible confusion of flavour sources but these do really go well together.
We’ll cal it
fusion rather than confusion.

Tuna and Potato

Just a pan fried tuna steak and some creamed potatoes (with a carrot & onion sauce)

atun-potat-05012010832

The sauce got spotty from tuna-water/fat/oil so was not as pretty as I wanted; but had very tiny-tiny onion and carrot pieces which is what made it special.

Lots of times when I was working in restaurant kitchens the only difference I noted in some recipes was that we chopped the veggies with great precision and in very small pieces.  That’s the thing with this dish; chop very small and make them all nice and same sized. The onions and carrots make this a sweetish sauce and the vinegar balances that.

  • 1/2 an onion
  • 2 carrots (same volume-wise as the onion)
  • very good olive oil
  • 2 T white wine vinegar
  • salt
  1. Chop the veggies super fine in nicely even-sized little cubes (you will need a sharp knife and/or a mandoline [like me])
  2. Sauté the veggies in the oil very slowly; until quite soft (without browning; this could take a half hour, easily)
  3. Add the vinegar
  4. Add a good dash of salt (this makes the whole thing taste sweeter – really it does)
  5. Be prepared to add more vinegar to get an attractive sauce consistency; add a bit at a time and switch to water before it gets too vinegary (you can make this sauce far (days) in advance, it keeps well [because of the vinegar] and can be heated later when “finishing” a dish {this is what we do in restaurant kitchens})
  6. Fry up the tuna steak in a frying pan
  7. When the steak is done transfer it to the sauce’s sauce pan, with its juices (there shouldn’t be a lot) – to infuse the sauce with some tuna flavour.
  8. Warm slightly and serve

I cooked a potato and creamed it (potato, salt, butter, pepper) so I would have something on the side to soak-up the sauce.

You can double, triple, quadruple the sauce recipe – no problem.

Pretty good with whitefish too (maybe cod, for example); but I like the look best with brown/tan fishes. Maybe not a great combo with salmon… I’ll have to think about that.

Vieira : Scallop

We ate this every single year at xmas or new years in Galicia. 

Before:
vieira04012010821 

After (well… 1/2 way) – it’s scallops, mushrooms and cream – that’s about it.
vieira-after-04012010825

Sauté the mushrooms, add cream, then add the scallops (whole or chopped in chunks) – cook briefly.
Ladle into the shells, cover with breadcrumbs and toast under the broiler.

You could get fancy and sauté a bit of onion before (& in addition to) the mushrooms – or finely chopped leeks.

Save the shells for next year.

Tapas – Often Fried and Salted

I was up in Madrid and popped out for tapas at a little Asturian place nearby.  Ordered all the favorites since I don’t get up there often and we don’t have a place like this anymore down here at the beach. We did… but last season the owner turned the place from a tapas bar into an Indian restaurant - - quite a dramatic change.  Now, for tapas, I have to go to the next town over.

Here’s what I had and how they are prepared.  Try it at home.

Morcilla: blood sausage, with rice and onions.  These were probably sliced and deepfried; at home I just do them in deepish pan.
tapa-morcilla-08122009785

These are little fried anchovies – Boquerones Fritos or Anchoas Fritas; dusted with a little flour before frying then salting (coarse salt) – they were beheaded and gutted but not deboned; probably soaked in lemon and water for a few hours before cooking.
tapa-anchov-08122009784

Pimientos de Padron (from Padron in Galicia) are small hot peppers.  An occasional one is super-spicy and surprises you; a sort of Hot-Peppers Roulette.  Fried and salted.
tapa-padron-08122009783 

Asparagus, green. Fried and salted. You can see an anchovy spine and hot pepper caps on the edge of the plate there.
tapa-asper-08122009782

del.icio.us Tags:

Beans : Fabas : Pork and Beans

Simple winter food (okay, it’s been more like 20-25 degrees C lately [that’s 70 or 80 F] but technically it’s winter) .

Soak the 250 gr [8 oz] of white beans overnight and drain away that first round of water.

Cover with water and add the sausage, black sausage and pork-fat-bacon (traditionally you might put an ear or a trotter in as well); no added salt.

fabas-before-23122009793

Cook, simmering, until the beans are just starting to go soft – skim off any foam and maybe the oil/fats from the sausage as you go. Keep the lid off to reduce the liquid (but add water if needed while cooking to just cover the beans. Might take an hour at least (depends on the bean).

Add a spot of saffron and a cup of simple thick tomato sauce (tomato and onions, basically). Reduce to a saucy consistency.

fabas-after-28122009798

Slice the meats before serving (remove the ear and trotter entirely and toss them [unless you’re a huge fan of gristle {some are}]).

This is what pork and beans was before Heinz got into the business.

See also an earlier post about Fabada Asturiana from 2005 with a properly written out recipe for something similar.

Boquerones : Marinated Anchovies

This is a tapa.  I was travelling up to Madrid a few weeks ago and while waiting at the bus station had a nice glass of red wine.  They set out a small plate of homemade garlic and oil marinated anchovies.

boqerones-06112009721

No additional charge for the tapa.

These are raw, although slightly pickled, anchovies. 

You clean and split the little fishies (fillets – remove the head and tail), debone (don’t worry about any tiny residual bonettes), let them sit in vinegar overnight, then rinse a bit (or don’t rinse, just shake – they’ll be tangier), cover in good olive oil, throw in some sliced garlic.  Maybe sprinkle some fresh chopped parsley.
You’re done.

The cautious will put the fillets in a glass dish or between parchment and freeze them for a few hours before doing the vinegar (to –20c, -4f) .  There a big panic about raw-fish-borne parasites going around and freezing apparently solves the problem.  It must be a recent problem because they’ve been doing boquerones here for the last 1900 years of so without massive parasite issues.

That amounts to a recipe.   Try it at home.   Start with a kilo of little anchovies.  You can maybe do the splitting, cleaning and deboning with your fingers and nail; don’t always need a knife.  It will be messy but fun.

Uitsmijter : Fried egg on toast

That’s Dutch, not Spanish. It means “to throw out”.

uitsmijter-22112009753

The name is traditionally said to come from the other meaning of uitsmijter which is “bouncer” (as in nightclubs). This being eaten/served as a late-night/early-morning snack at a cafe or club just before everyone gets kicked out at closing.

  • Toasted white bread
  • A slice of cheese
  • 1 egg; sunny side up (fried in 1 T of good olive oil)
  • ham under the egg (optional)
  • tomato slices under the cheese(opt)
  • salt & pepper
  • mustard (opt) (not horrid yellow mustard though)

This has been my favorite quick snack these days. Use fresh eggs (the yolks are more shapely) and keep the yolk runny.

There has been no actual “cooking” going on around here for months. This is the closest I’ve come recently so I’m tagging it as a “recipe”.

del.icio.us Tags: uitsmijter

LiveJournal Tags:
Technorati Tags:

Creamed Carrots: Crema de Zanahoria

carrotpotage10092009628

Another easy one; to make with stuff from the veggie bin in the fridge.

I like mine on the thick side. You may make it more soupy.


Crema de Zanahoria : Creamed Carrots

Serves: 5

Ingredients

  • 700 gr carrots, peeled & chopped [1 1/2 #]
  • 1 onion, diced (maybe a shallot or 2 if you’ve got some)
  • 2 leeks, white part, chopped fine (or 1, or 3, or none)
  • olive oil
  • 1/2 t cumin
  • salt
  • pepper
  • 1/2 C dry white wine (I used cava)
  • 1 C cream
  • 1/2 C milk
  • 1/2 C carrot water

Procedure

  1. Oil into a sauté pan
  2. Sauté the onions and leeks slowly, not browning
  3. Meanwhile, boil the carrots in water just barely not covering
    • Until they’re 1/2 cooked, just getting softer
    • Reserve the carrot-water when draining the carrots
  4. Carrots go into the pan with the onions and sauté lightly until tender
    • Add a tablespoon of carrot-water if things threaten to get burnt/toasty
  5. Set carrots and onion etc aside
  6. Deglaze the sauté pan with white wine, reduce by 1/2 or 2/3rds
  7. Put carrots, onions, leeks, & pan juices into a container and run the whole mess through a vegetable mill, or use a stick blender or a mixer of some sort
    • Get it as fine as can be. Add some carrot-water if it’s too thick to process properly.
  8. Put this goop into a pot on the stove and add the cream
  9. Heat and stir – do not boil
  10. Add 3 T olive oil, stir
  11. Season with the cumin, add salt and pepper
    • Taste it before continuing
  12. Add the milk – watch out for the thickness
  13. As required, add carrot-water to obtain a syrupy consistency
  14. Heat and stir – and taste
  15. When you feel it’s about right that means that you’re done

Smoked Salmon Salad

salmsalad06092009616

It doesn’t get much easier than this.

Sure, it’s best if you smoke your own salmon and pick the greens fresh from your garden but I just popped down to the local grocer’s instead.

The only thing “made” here is the tartare sauce [tartar in the U.S.] which in this case is a continental version so we can be snobby and call it a remoulade. With either name it amounts to mayonnaise plus pickles and other stuff.

I used an off-the-shelf olive-oil mayonnaise since my mayonnaise-making fails at least half the time and I didn’t want the hassle.

It’s simple really; take a cup of the good-quality mayo, finely chop 2 Tablespoons each (when chopped) of

  • shallots (really really fine)
  • gherkin pickles (the tiny ones)

1 T of chopped

  • capers (not at all fine because they turn to mush; just so they’re not whole)

and stir it into the mayo. Add a squeeze of lime juice (1/4 lime or there about).

Taste, add more of whichever thing it needs. Add some pickle juice or caper juice if it’s a real thick sauce; it ought to flow somewhat (see the picture with a puddle of sauce).

The salad is just some greens, a thin layer of the sauce, more greens, then the smoked salmon on top. This was done in one of those little circular forms to give it some structure. And extra sauce on the side.

If this was a real remoulade you’d add some fresh chopped tarragon, chervil and parley; chervil’s the key ingredient there.

Anyway… that’s it. Simple, fast, pleasing. What more could one ask?

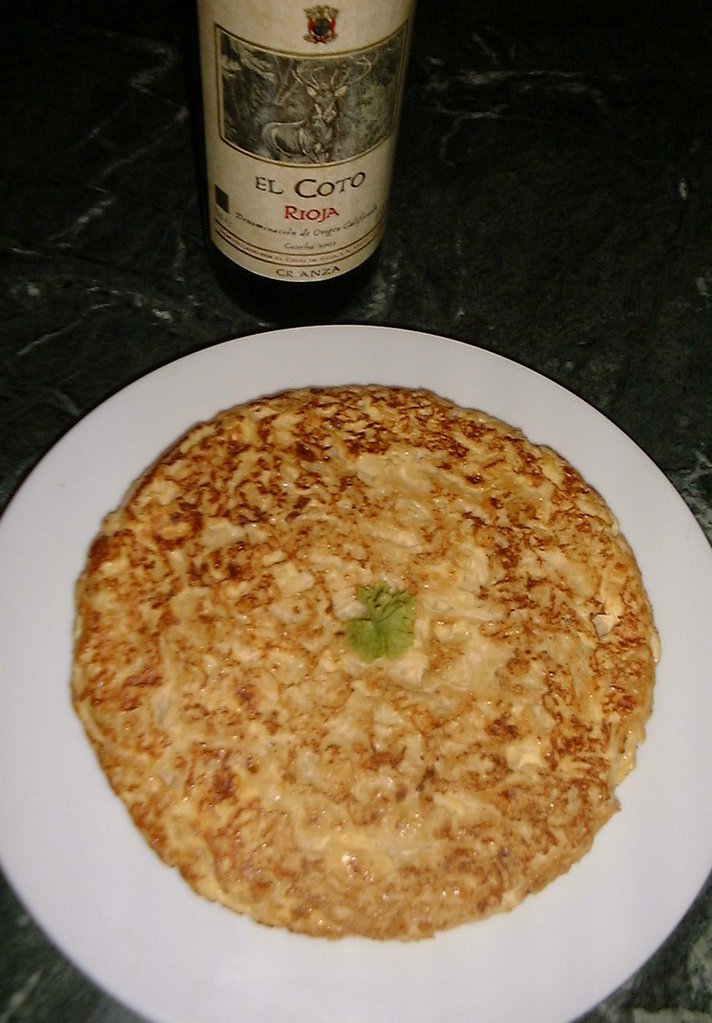
Tortilla Española, Estilo Nuevo : Spanish Tortilla, New Style : Deconstructed

A deconstructed Tortilla Española (Spanish Tortilla).

06092009618

Quite different than this normal looking tortilla:

See also a post at Tortilla de Cebolla

Taking a page from Ferran Adrià (chef & sort of mad scientist) and his recipe for a modern tortilla; having three components: caramelized onions, a simple sabayon (egg) and potato foam (yes, that’s foamed potatoes.

Instead of mixing all the ingredients together they are separated and layered over each other. Taste them individually or dig through to the bottom and have all three together.

The following is what I actually did – with slight variance from his original recipe. It’s quite a bit easier than it might look at first glance.


Deconstructed Tortilla Española

Serves: 2

Ingredients

Caramelized Onions
  • 1/2 medium onion – julienned, finely sliced
  • 4 shallots – julienned, finely sliced (equal in amount to the onion)
  • 60 ml olive oil [1/4 C]
  • 1 T butter (or a little less)
  • 100 ml water [1/2 C]
  • salt
Sabayon
  • 2 egg yolks
  • 2 T boiling water
  • salt
Potato Foam
  • 150 gr potatoes [1/3 #] (that’s about 1 potato)
  • 75 ml cream (heavy/whipping cream) [1/2 C]
  • 2 T olive oil
  • salt

Procedure

Caramelized Onions
  1. Oil into a sauté pan, then the butter
  2. Sauté the onions and shallots slowly, until browning
    • takes about 20 minutes
    • stirring regularly or, if you have the patience, continuously
  3. Drain off any excess oil
  4. Add 1 T of water, stir, and continue until the water evaporates
    • repeat: water, stirring, cooking until the water’s gone (this could go for another 20 minutes)
    • You’re going for a jam consistency and golden brown color
  5. Salt to taste
Sabayon
  1. In a pan, whisk the egg yolks until creamy and consistent
    • getting air in the mix is just fine
  2. Add the boiling water in a drizzle and keep on whisking
  3. Whisk with enthusiasm over medium heat, maybe use a double boiler, until it’s emulsified
    • Don’t stop whisking or you might end up with scrambled eggs
    • When it’s ready it will just barely drip from the whisk and be really full of small bubbles
    • If you have an instant thermometer it would be 80 C [180F]
  4. Salt to taste (do not omit this step)
Potato Foam
  1. Peel, chunk and cook the potatoes until soft
    • Start the potatoes in cold, lightly salted water, just enough to cover
    • They’re ready when a knife goes in easily and slips out equally so
  2. Drain over a bowl, saving the cooking water
  3. Puree/blend the potatoes, with 3 T of the potato-water, and drizzle in the cream
  4. Then drizzle in the oil, pureeing the whole while
    • Until it’s smooth
  5. Salt to taste (don’t leave out this salt either)

You can stop now and resume later (see notes) or carry on right away.

Now comes the sort of complicated bit; you need a stainless steel whipped cream maker (1/2 liter [quart] size) (or see notes for a possible alternative)

  1. Strain the creamed potato into the whipper
  2. Charge (2 cartridges) the whipper
  3. Set in a pan of hot water, you can put the sabayon there too
Construction
  1. 1 T (heaping) caramelized onions in the bottom of a tapered glass
  2. Spoon in sabayon to cover
  3. Shake thrice and invert the whipper with the potato foam and spurt in a goodly quantity of potato. At least as deep as the other two layers
  4. Drizzle a little bit of olive oil on top

Done

Notes

  1. I made everything well in advance and stashed it in the fridge
  2. The sabayon firmed up quite a bit from the liquidy form it had when I finished making it. That didn’t matter since it was going between two other layers
  3. Warming the caramelized onions up in a sauté pan
  4. Warming the sabayon in a bain marie of hot water (just a biggish pot really)
  5. Warming the creamed potato in a pot, adding a touch (2 T?) of potato-water to make up for absorbed or evaporated liquid
  6. And then straining and charging the whipper with it and stashing it the bain maire
  7. The caramelized onions are quite thick and jammy. Don’t put too much in the glass. I probably overdid it.
  8. In the event that you don’t have a whipper/foamer I imagine you could whip up the creamed potatoes really well and end up with something sort of conceptually similar. Whip in large bowl with and electric whip and whip at the edge of the mixture to incorporate a lot of air. Cover half the top of the bowl with plastic film to avoid a huge mess.

Crème Brûlée without an oven

I wanted to make this classic, simple, dessert so I could use my kitchen blowtorch again. The challenge in this case is that at my current place I don’t have a regular oven (only a microwave) and this dish is normally cooked in the oven.

cremebrulee23082009601

The solution: create a Bain Marie on the stovetop with a frying pan. The capacity of this setup is rather limited, two at a time in this big frying pan, but it did work quite nicely.

cremebruleebath22082009589


Crème Brûlée

Serves: 2

Ingredients

  • 1 C heavy cream
  • 1 vanilla bean
  • 2 egg yolks
  • 2 T sugar

Procedure

  1. Split the vanilla bean and scrape the inside goop
  2. Heat the cream in a pan with the bean and its scrapings
    • just to when it starts to bubble
    • set aside for an hour or two to infuse the flavour of the vanilla
  3. In a bowl mix the egg yolks and sugar
    • Until it forms something like a ribbon when dripping off the whisk
    • Avoid getting it all foamy
  4. Reheat the cream to just bubbling
    • Remove the bean pod
  5. Add cream to the egg mixture
    • very slowly (to avoid cooking the egg with the hot cream)
  6. Strain the mixture (in case of any little lumps of cooked egg)
  7. Pour into some little dishes
  8. Place a few layers of kitchen paper in the frying pan
    • Splash in a bit of water to make things less slippy
  9. Put the molds in the pan
  10. Fill with hot water most of the way up the molds
  11. Keep the water just on the simmer
    • Add more hot water if the level drops much below 1/2 way on the molds (keep an eye on it – check every 15 minutes or so)
  12. Cook for an hour
    • Until the entire top of the custards are cooked over (it will be wiggly)
    • Most of the contents of the mold will still be liquid (not to worry)
  13. Chill a good 4 hours (or a day)
    • Cover once they’re cool
  14. Just before serving sprinkle sugar on the tops and toast with your blowtorch

Done

Notes

  1. Or cook in a medium oven and a pan of hot water for 35-45 minutes
  2. Mess with the sugar amount if you like it more or less sweet (I doubt honey would work in this recipe but it’s worth a shot)
  3. The recipe is halved in this case but you can easily halve, double or quintuple it.  It works well at almost any volume
  4. If they’re still liquidy after cooling you can redo the “cooking in a bain marie” process until you’re sure they’re done.  Give it two hours if you have to (but it won’t be)

Short version

  1. Infuse flavor into cream by cooking the cream and the flavour component (in this case, vanilla)
  2. Mix eggs and sugar together
  3. Add reheated cream to egg mixture, slowly, and strain to remove lumps (if any)
  4. Cook in a bain marie until the top is set; then chill (the custards)
  5. Decorate with toasted sugar


Technorati Tags: ,

Chipirones en su tinta : Cuttlefish in ink sauce

You might not have ever eaten black food.  This is a good place to start.  It’s a very typical dish; a very small squid, the body stuffed with tentacles and the sauce made using the squid ink. Usually served with white rice - - for the contrast I guess.  I had it a while ago in a restaurant in town.

chipriones-26072009526 


Chipirones en su tinta : Cuttlefish in ink sauce

Serves: 4

Ingredients

  • 12 or so chipirones (little squid, cuttlefish) cleaned; 1kg [2#]
  • olive oil
  • 2 onions, chopped fine
  • 1 green pepper, chopped
  • 1/4 C parsely, chopped
  • 2 cloves of garlic, chopped
  • 1/2 C white wine
  • 1/4 C tomato sauce
  • 1 package squid ink

Procedure

  1. Clean the chipirones; see notes
    • chop
  2. Oil in a pan
  3. Onion in the pan, soften
  4. Add 1 of the garlic cloves
  5. Add the tentacles
  6. Sauté 5 minutes; just to color
  7. Add the parsely, stir
  8. Stuff into the bodies of the squid; seal the open ends (toothpicks?)
  9. In that same pan, more oil, fry the squid for color – set aside
  10. In that same pan, put the other onion - soften
  11. Add the other garlic clove
  12. Add the green pepper
  13. And the wine and tomato sauce
  14. Dilute the ink in a bit of wine and add that
  15. Add the rest of the wine
  16. Cook a good while (15 min)
  17. Puree the sauce; maybe with a stick mixer
  18. Add the squid to the sauce; bring to a boil and simmer 20 minutes
  19. Remove the toothpicks

Done

Notes

  1. Clean chipirones by removing the tentacles, eyes, beak and bone.  Keep the tentacles and the pouch
  2. If there’s not enough sauce when you add the squid to at least 1/2 cover then then use more wine or some fish stock

Albondigas de Iberica : Iberian Meatballs

albondigasdeiberica

With rice. These meatballs are made from the meat of Iberian pigs; the ones they use to make Iberian Ham (much better than Italian Prosciutto).

I hope I find the other phone-cam soon or I’m going to have to invest in some new equipment; the pictures with this substitute phone-cam suck.


Albondigas de Iberica : Iberian Meatballs

Serves: 4

Ingredients

  • 2 T lard (real lard)
  • 1 carrot, chopped
  • 1 onion, chopped
  • 3 cloves garlic, smashed
  • 1 cup ham/beef broth
  • 1/2 C dry white wine
  • pepper
  • 2 T olive oil
  • 500 gr [1#] Iberian meatballs (oh my! they were bought ready made)
  • 1/4 C dry white wine
  • 2 T tomato sauce
  • 1/2 C ham/beef broth

Procedure

  1. Melt lard in a pan
  2. Chop the veggies and garlic and toss into the hot lard
    • Medium heat, to soften the onions and until just picking up some color
  3. Add the wine (deglaze if needed and add the up of broth
    • Until the carrots are really soft
  4. Meanwhile, brown the meatballs in the olive oil
  5. Remove the browned meatballs and deglaze with the 1/4 C white wine
  6. Puree the carrot/onion mix with a stick blender
  7. Put the sauce into the meatball pan, season with pepper
  8. Add the tomato sauce, meatballs and the bayleaf
    • If needed add some ham/beef broth to make sure they’re 3/4 covered and that the sauce isn’t too thick
  9. Cover and simmer for 45 minutes (to cook the meatballs and blend flavours)

Done

Notes

  1. Use lard. It really does add something to the flavour
  2. I used artisanal, handmade, Iberian pork meatballs; faster than making them myself.
  3. Stick-blend the sauce until it’s really fine. This could take a minute or two.
  4. Served with rice: 2 parts rice to 2 parts ham/beef broth, 1 part wine and 1 part water
  5. This kind of sauce can be used with all sorts of dishes (substitute fish broth for fish dishes or veggie broth for vegetarian dishes). The basic idea of a carrot/onion/tomato sauce is very versatile and it makes a great base to braise things in.

Revuelto de Morcilla : Scrambled Blood Sausage

Catchy title, isn’t it? 

My good phone-camera is currently missing and I’m using a backup.  One which I have, obviously, not quite figured out.  If this pic looks less than appetizing it might be the camera’s fault (or the user thereof) or it might be what you opine regarding the ingredients  - - or maybe the appearance of the final dish.

revueltodemorcilla

It really is very tasty and it’s not just a made up dish.  You can get this in cafés ‘most everywhere.


Revuelto de Morcilla : Scrambled Morcilla

Serves: 4

Ingredients

  • oil, for frying, and lots of it
  • 1 very large potato (or 2 medium large)
  • 1 morcilla (also large)
  • 1 green pepper
  • 4 eggs, stirred up with a fork
  • a dash of salt or two

Procedure

  1. Peel then cut the potato into very thing julienne strips (we’re talking shoestring/straw potato sized)
  2. Place in a bowl of cold water, dump the water (essentially a rinse), refill with cold water and into the fridge for 20 minutes
  3. Peel the skin from the morcilla, cut into 1cm [1/2”] cubes
  4. De-seed the green peppers and cut into julienne [sticks]
    • The strips ought to be on the short side; maybe 4-5 cm [2”]
  5. Drain the potatoes; fry them up in a lot of hot oil until just turning brown (in a couple or three batches)
    • Dump the excess oil once the potatoes are done
  6. Fry up the green peppers, in a little oil, medium heat, until just softening
    • Add a dash of salt
    • set  them aside
  7. Fry up the morcilla, in a little oil, until just cooked
  8. Add the green peppers back, stir it around
  9. Add the eggs, stir it around until the egg-juice is just set (keep it moist – avoid over cooking and making it dry)
  10. Salt the shoestring potato straws
  11. Serve the scrambled up morcilla over a pile of potato straws

Done
Messy and odd looking but good

Notes

  1. I used fresh Morcilla of Burgos (rice and onion based)
  2. Chilling the potatoes in the fridge is important.  I think this step gets rid of excess starch so the potato straws stay nice and separate
  3. Red pepper works just fine as well
  4. Using 5 or 6 eggs would be okay too.  I went really quite light on the egg proportion
  5. Potato straws can be made hours in advance, no problem - - and they’re good all on their own.

Couscous with Stuff

Having leftover rump one needs to do something with the residual. Today’s lunch was the same beef (still delicious) with a quick couscous.

with couscous 27112008297

The beef was nuked at 1/3 power for 5 minutes (I prefer slow microwaving for warming things up) just to take the chill off. The couscous was --- boiling a big cup of chicken stock (you have homemade, frozen, saved from your chicken carcasses?) and tossing in the same amount of couscous, setting it aside to soak up the liquid.

Meanwhile, fry a half a chopped onion, a diced carrot, a smooshed and minced garlic clove, and a finely diced tomato. That goes into the couscous after the couscous has sat in the boiling hot chicken stock for 5 minutes.

Then, the couscous needs a drizzle of very good olive oil.

The carrot gives the couscous a nice bit of color.

Cuadril : Rump

Argentinean meat is widely imported to Spain and it’s particularly good. This is a rump-tip I think you would call it.

tapa 25112008292

This one I stuffed with leftover rice, mixed with 5 chopped up little (gherkin?) pickles, double that of green olives, seared it in a frying pan first then baked in a 150 C [300F] oven for an half hour for each half kilo [1/2 hr / #]. Let it sit for 10 minutes, covered with foil, before slicing. Looks pretty impressive for something made up on the spur of the moment. And tasted damn good.

Since the oven was going anyway I baked a potato in there too.